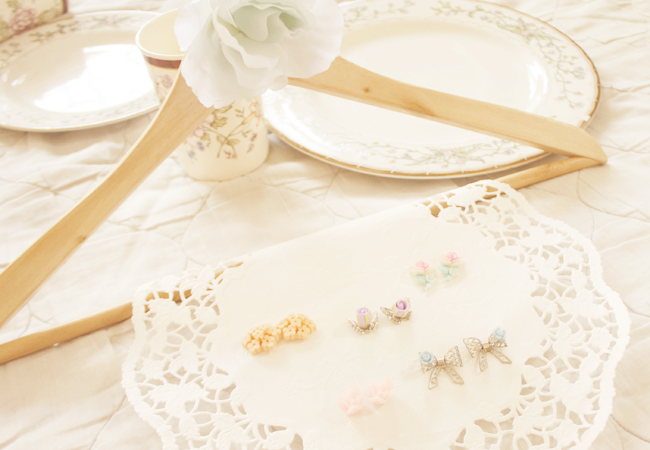
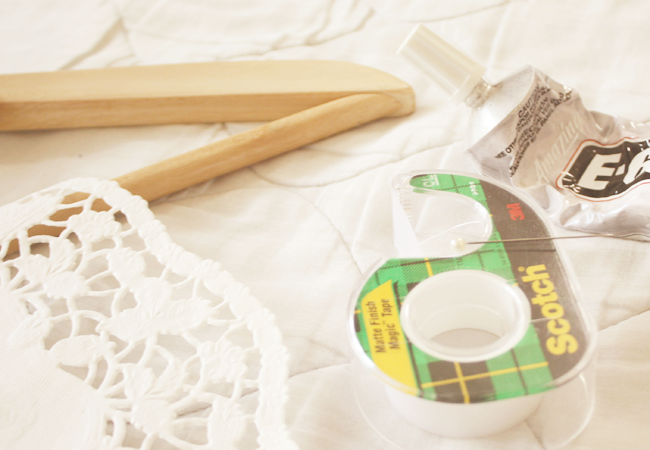
I bring you another of my DIY projects yet again. I've been feeling very inspired lately, and it feels good to be coming up with ideas to share with you, people. First up is a doily jewelry hanger. It's a really simple project which includes the use of a doily, a hanger of your choice (I bought my wooden hanger from IKEA - Don't you just love IKEA?) and a beautiful rose in light sea foam. It's best if you buy a bouquet of flowers so you can simply pluck them individually for your next craft project. You will also need a hot glue gun (I use E6000 glue), tape, a needle pin and some pretty ear studs, of course.
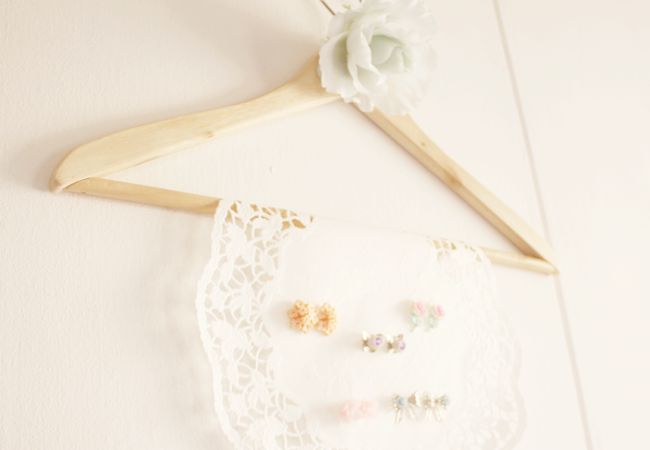

Firstly, fold your doily in such a way it can cover part of the hanger and secure with tape (I use Scotch's transparent tape) and simply use a needle to poke a hole into the doily to insert your lovely ear studs. I'll recommend about 5 to 6 pairs of ear studs at one go so that it won't be too heavy on the hanger itself.
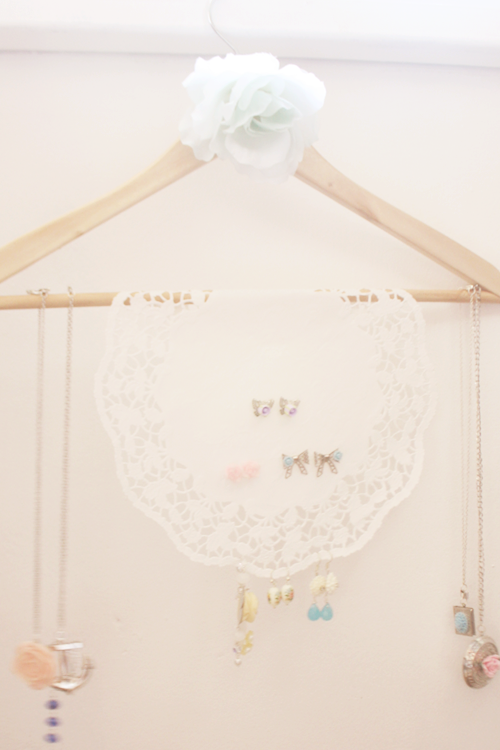
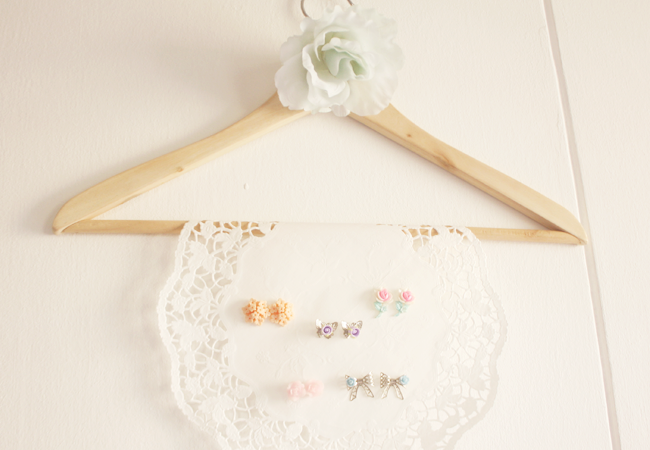
You can also add in some necklaces and hook earrings
at the doily but try to not overcrowd it
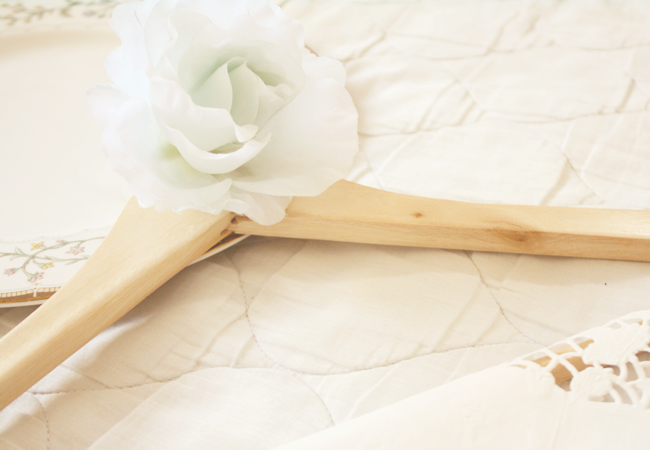
Finish off with gluing the rose onto the top of the hanger for that dainty look. You could also go the extra mile with painting the entire hanger in the color of your choice but I chose mine to be in classic wooden color. After all, it does give off that vintage romantic look, doesn't it?
The best part is, you can always replace with a new doily when needed (especially when there are too much holes after much wear and tear) - and they aren't that expensive either. If you ever feel like transforming it into a hanger again, simply remove the doily and use it for hanging your lacey tops and dresses. The rose adds an elegant overall touch to it.
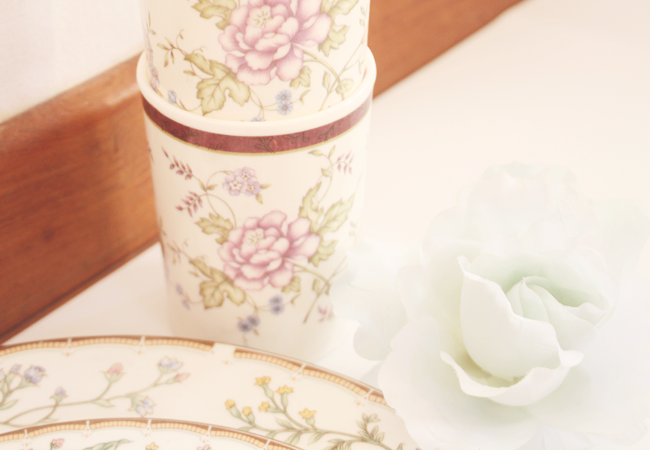
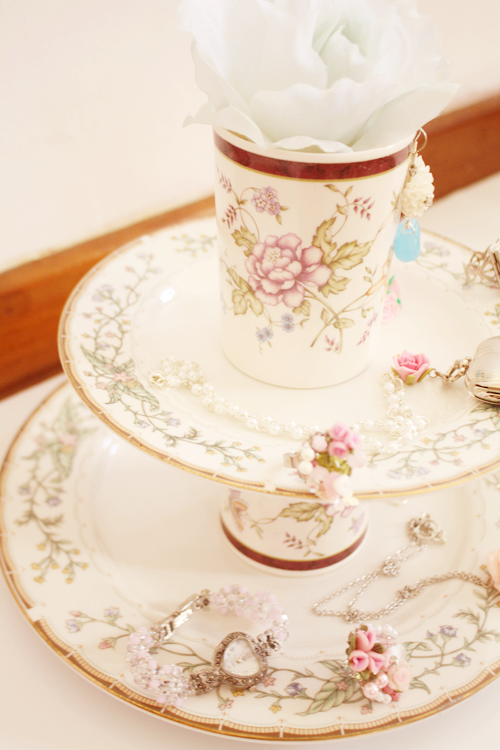
Next up, we have an inexpensive cake stand. As mentioned in my previous post, I own a cake stand but I've seen many DIY cake stands that seem effortless so I hesitated no more and decided to create one of my own. If you have some pretty looking plates lying around the house that you don't need, why not use them to make a cake stand for your next tea party or as a jewelry display? What you'll need are two or three round plates (You could explore with the different shapes of plates) in different sizes. For my case, I've managed to secure some vintage decor plates which is bigger than the other. Next, you might have seen my vintage cups which I used to stack up but I thought they'll look great to be used in my cake stand project so you'll need some cups as well. I personally feel you can use any sort of cups - tea cups might also do the trick but I like to increase the space in between the plates (see image below) so I've used slightly taller cups. I chose mine to be a two tier cake stand instead but you can add an extra plate to make it into a three tier cake stand.
The best part is, you can always replace with a new doily when needed (especially when there are too much holes after much wear and tear) - and they aren't that expensive either. If you ever feel like transforming it into a hanger again, simply remove the doily and use it for hanging your lacey tops and dresses. The rose adds an elegant overall touch to it.
Next up, we have an inexpensive cake stand. As mentioned in my previous post, I own a cake stand but I've seen many DIY cake stands that seem effortless so I hesitated no more and decided to create one of my own. If you have some pretty looking plates lying around the house that you don't need, why not use them to make a cake stand for your next tea party or as a jewelry display? What you'll need are two or three round plates (You could explore with the different shapes of plates) in different sizes. For my case, I've managed to secure some vintage decor plates which is bigger than the other. Next, you might have seen my vintage cups which I used to stack up but I thought they'll look great to be used in my cake stand project so you'll need some cups as well. I personally feel you can use any sort of cups - tea cups might also do the trick but I like to increase the space in between the plates (see image below) so I've used slightly taller cups. I chose mine to be a two tier cake stand instead but you can add an extra plate to make it into a three tier cake stand.
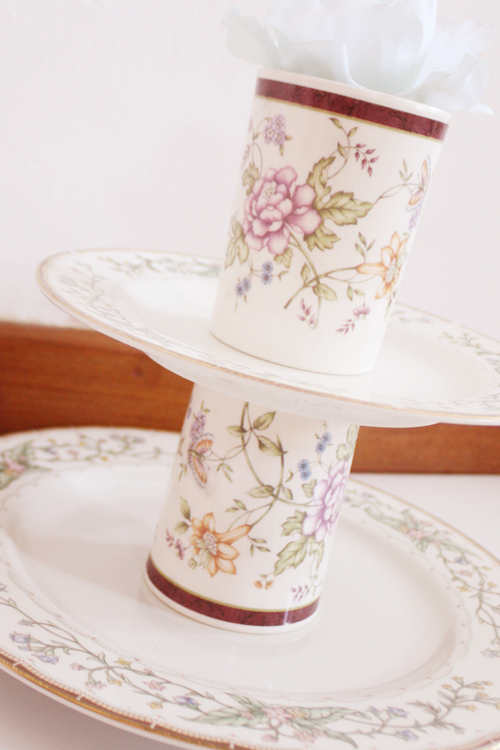
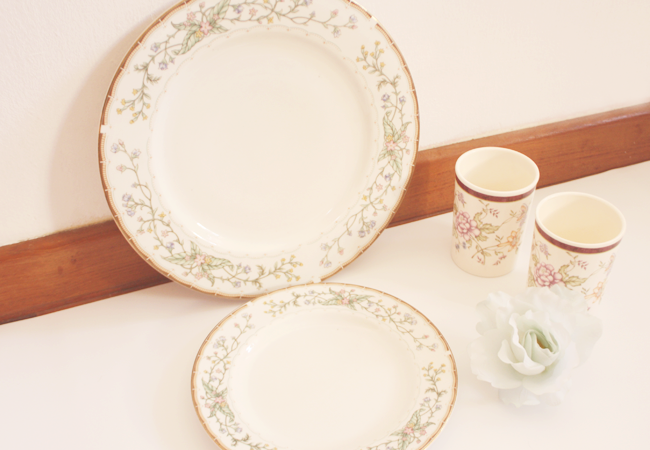
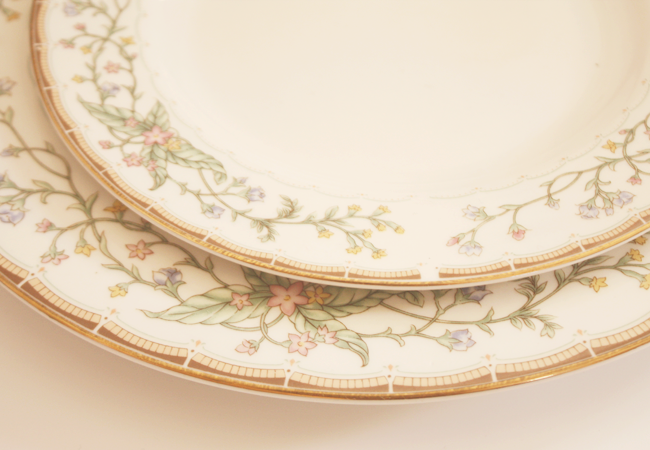
Loving the gold trim details on the plates
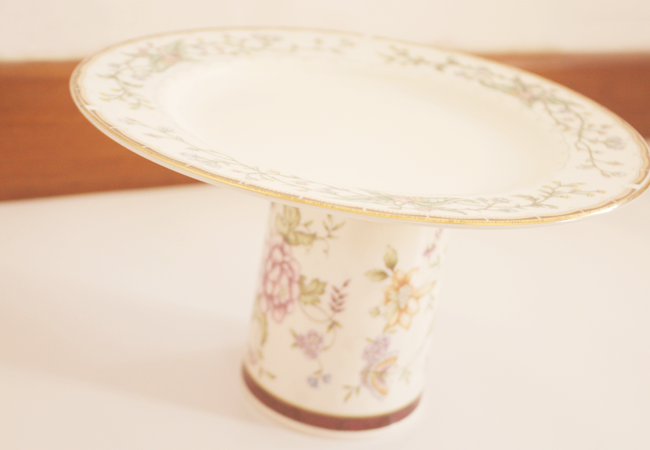
All you need to do is to secure the cup (you can actually choose not to face it upside down but it's entirely up to you) with good old glue in the center (use hot glue gun for best bonding) and place the bigger plate below it. Now, this is a bit tricky if you're using the position as seen here. You'll need to glue on the sides of the cup but make sure they're secured enough to not topple over.
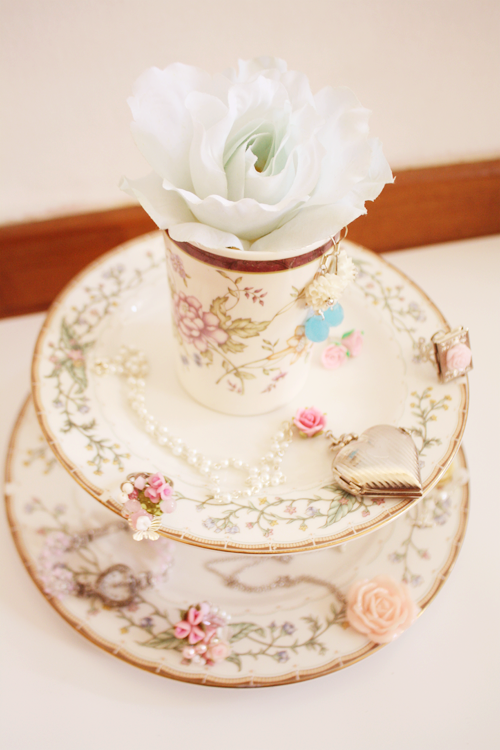
And voila! Add a rose on the top or cover it with pearls and laces
- whatever you fancy as long as it makes you happy!
Now, didn't I tell you this was easy? I hope you will feel inspired to make these two simple projects for your own personal use and if you like, feel free to share with me if you've made your own creations using this project.
Next up in my to do list: Redecorate my plain walls & my clock from IKEA.
Next up in my to do list: Redecorate my plain walls & my clock from IKEA.