
Another simple project by yours truly.
All you need is a good old piece of recycled box. You might not believe this, but the inspiration behind this project was because my grandmother used this transparent box of cotton buds (new ones, of course) to store some of my jewelry pieces. It comes in a shape of a square and is perfect for storing all those trinkets away, especially for your rings. I've previously showed you a way to display your ear studs and showcase your necklaces.
This idea came into mind with the purchase of several doilies from a baking store a few days ago. It seems effortless even for a newbie so let's start, shall we?
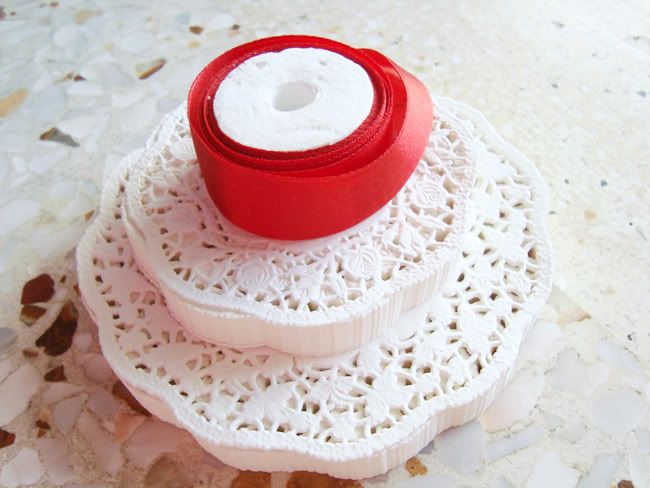
First of all, you will need a beautiful satin tape (I thought of red as the 'Little red riding hood' or 'Snow white's poisonous apple' which fit perfectly) and some doilies, one size bigger than the other.
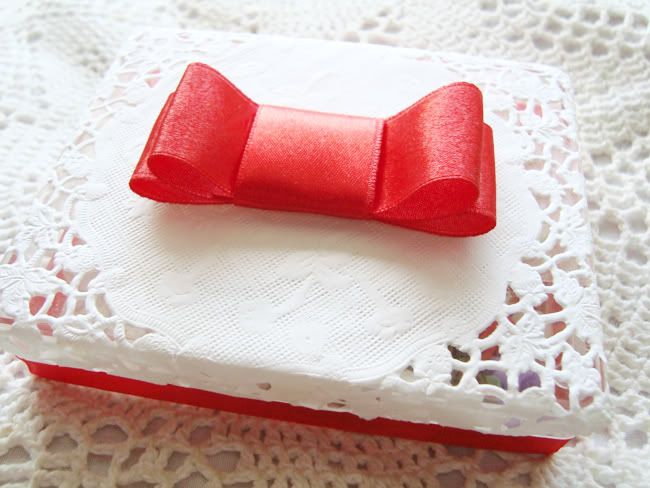
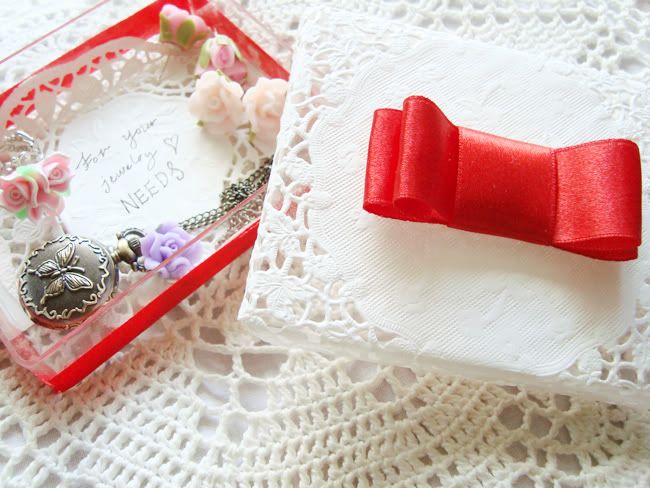
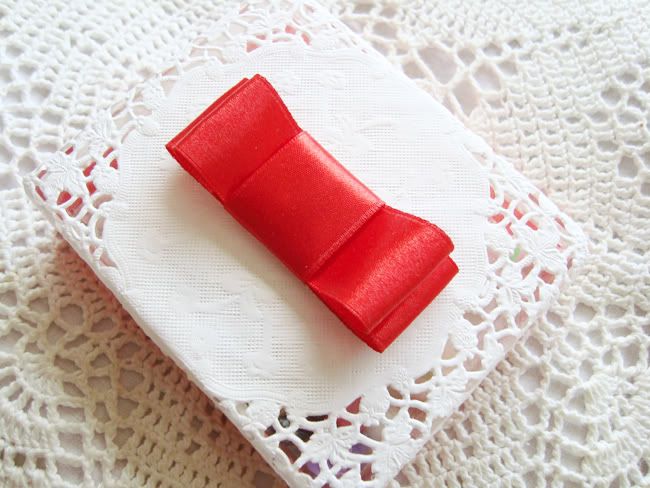
I began with wrapping the bigger part of the doily around the cover of the box and used transparent tape to secure it into place. Next, I added a handmade red ribbon (tutorial here) and placed it in the center of the box cover (I used E6000 glue, or any sort of glue that sticks really well) and you're done for the box cover! I quite liked the intricate details of the doily patterns on it.
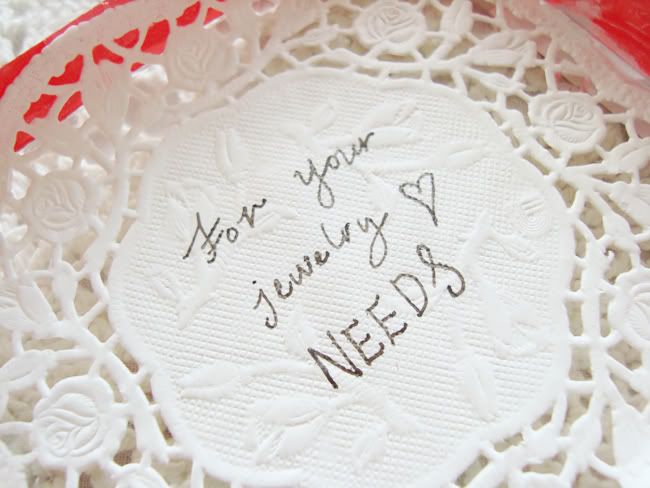
Lastly, I've used the smaller doily and wrote the words, 'For your jewelry needs' with a heart shape and secure it with tape as the base.
This idea came into mind with the purchase of several doilies from a baking store a few days ago. It seems effortless even for a newbie so let's start, shall we?
First of all, you will need a beautiful satin tape (I thought of red as the 'Little red riding hood' or 'Snow white's poisonous apple' which fit perfectly) and some doilies, one size bigger than the other.
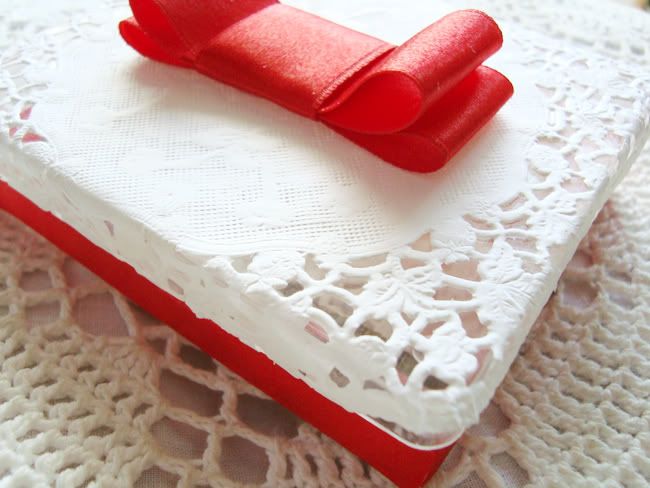
Next, since the satin red tape is rather thick in terms of width, I cut it into half to cover the sides of the box. I couldn't cover the entire part of it because it might not fit snugly when closed.
I began with wrapping the bigger part of the doily around the cover of the box and used transparent tape to secure it into place. Next, I added a handmade red ribbon (tutorial here) and placed it in the center of the box cover (I used E6000 glue, or any sort of glue that sticks really well) and you're done for the box cover! I quite liked the intricate details of the doily patterns on it.
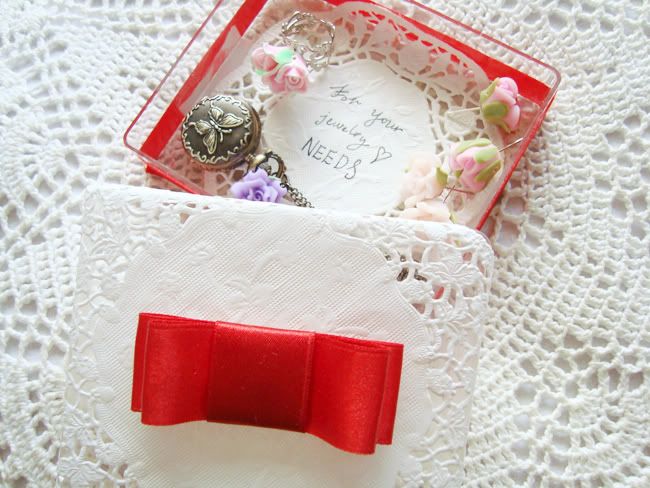
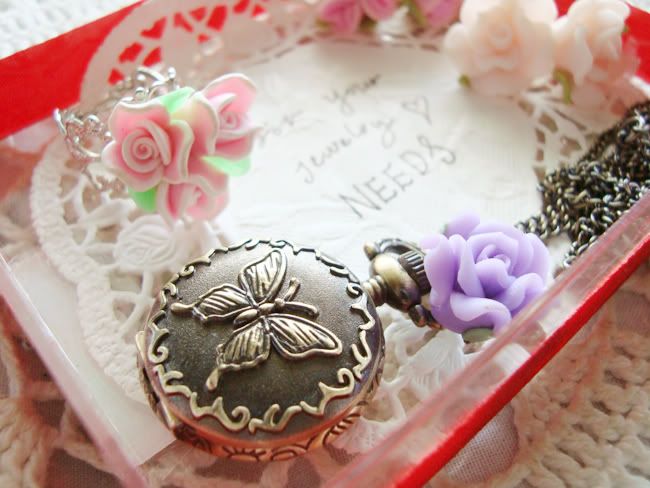
Add in your beautiful jewelry pieces and you now have a jewelry box to store your treasured little trinkets. I hope you've enjoyed this simple project and don't be afraid to embrace creativity!
For other simple doily projects, you might want to check out my doily jewelry hanger and doily mirror. Have fun exploring with doilies and laces :)